Azure DevOps Rest API - Introduction & CliFx
Introduction
This is the first in a series of posts that will cover some of the Azure DevOps Rest API. However, this post is a bit of a tangent, in that it will be looking at the CliFx framework instead of looking at a specific Azure DevOps concept.
A few weeks ago, I ran across this framework for developing command line utilities. In future posts, I will be using this framework to develop a command line tool to give concrete examples of how the Azure DevOps Rest API works.
In this post, I will be going over the basics of how you set up CliFx so that you get a feel for how it works. If you are interested in a more comprehensive look at it, the documentation on the site if very thorough.
Installing the NuGet Package
First, let’s install the CliFx NuGet package. You can install the package in a a number of different ways. If you are using Visual Studio, then you can install it through the Manage NuGet Packages menu option. Alternatively, you can install it through the Package Manager with this command:
Install-Package CliFx
Or through the .NET CLI with this command:
dotnet add package CliFx
Startup Configuration
Once the NuGet package is installed, the Main method needs to be changed to initialize the CliFx framework.
public static async Task<int> Main() =>
        await new CliApplicationBuilder()
            .AddCommandsFromThisAssembly()
            .Build()
            .RunAsync();
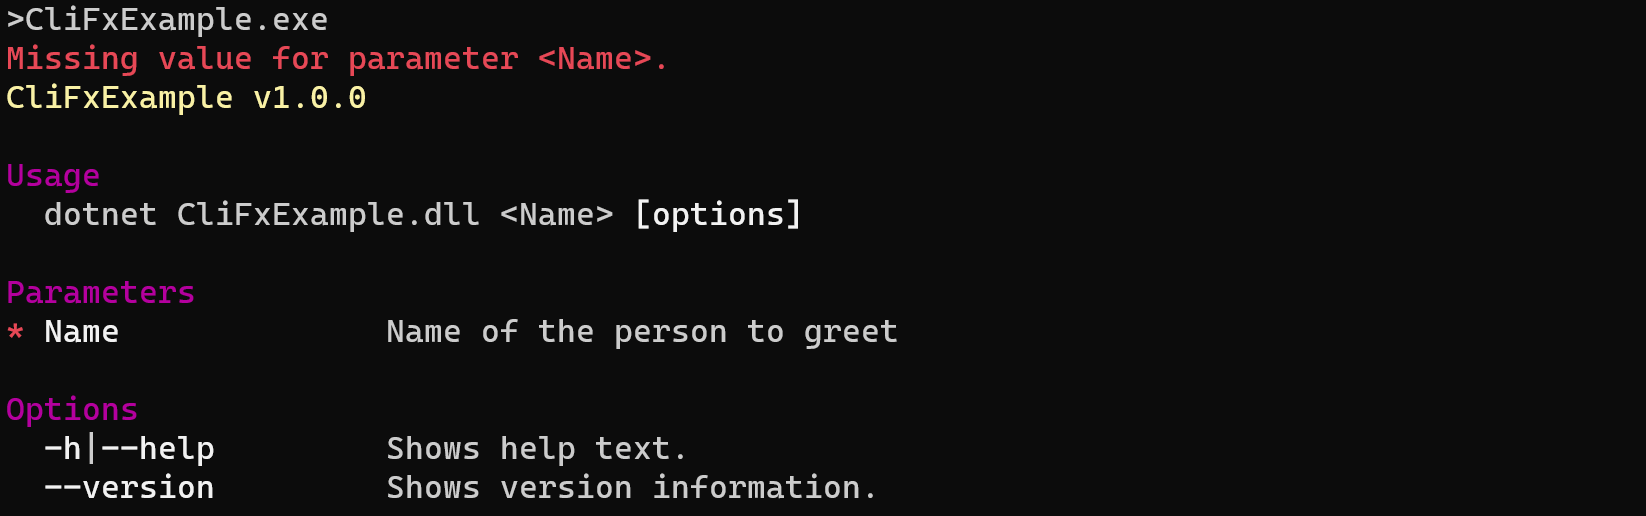
Running the application at this point will display the following error.

Adding a Command
Now, let’s add a command to the application. The key things to note here are that you need to mark your class with the [Command] attribute, and your class needs to implement the ICommand interface.
[Command]
public class HelloWorldCommand : ICommand
{
    public async ValueTask ExecuteAsync(IConsole console)
    {
        await console.Output.WriteLineAsync("Hello, World!");
    }
}
If we run now, it will now display the Hello, World! message to the console.

Adding a Command Parameter
A command parameter allows you to provide data into your command. To add one, you add a property to your command class, and mark it with the [CommandParameter] attribute. Command parameters are required, and you can optionally add a name and description that will be used when CliFx displays the help message. Here, I am adding a Name parameter to the HelloWorldCommand.
[Command]
public class HelloWorldCommand : ICommand
{
    [CommandParameter(0,
        Name = "Name",
        Description = "Name of the person to greet")]
    public string Name { get; set; }

    public async ValueTask ExecuteAsync(IConsole console)
    {
        await console.Output.WriteLineAsync($"Hello, {Name}!");
    }
}
If I run the command without passing the parameter, an error is displayed, along with the help message.
If I run it with a name parameter, it will display a greeting using the provided parameter.

Adding a Command Option
Adding a command option is another way of configuring a command. Instead of being index based like parameters, options are always specified by name. To add an option, you add a property to your command class, and mark it with the [CommandOption] attribute. By default, options are not required, but you can make them required if needed. Below, I am adding a Colorize option that controls whether the name is displayed in a different color.
[Command]
public class HelloWorldCommand : ICommand
{
    [CommandParameter(0,
        Name = "Name",
        Description = "Name of the person to greet")]
    public string Name { get; set; }

    [CommandOption("colorize", 'c',
        Description = "Colorize the output")]
    public bool Colorize { get; set; }

    public async ValueTask ExecuteAsync(IConsole console)
    {
        await console.Output.WriteAsync("Hello, ");
        if (Colorize)
        {
            console.WithForegroundColor(ConsoleColor.Green, () =>
            {
                console.Output.Write(Name);
            });
        }
        else
            await console.Output.WriteAsync(Name);
        await console.Output.WriteLineAsync("!");
    }
}
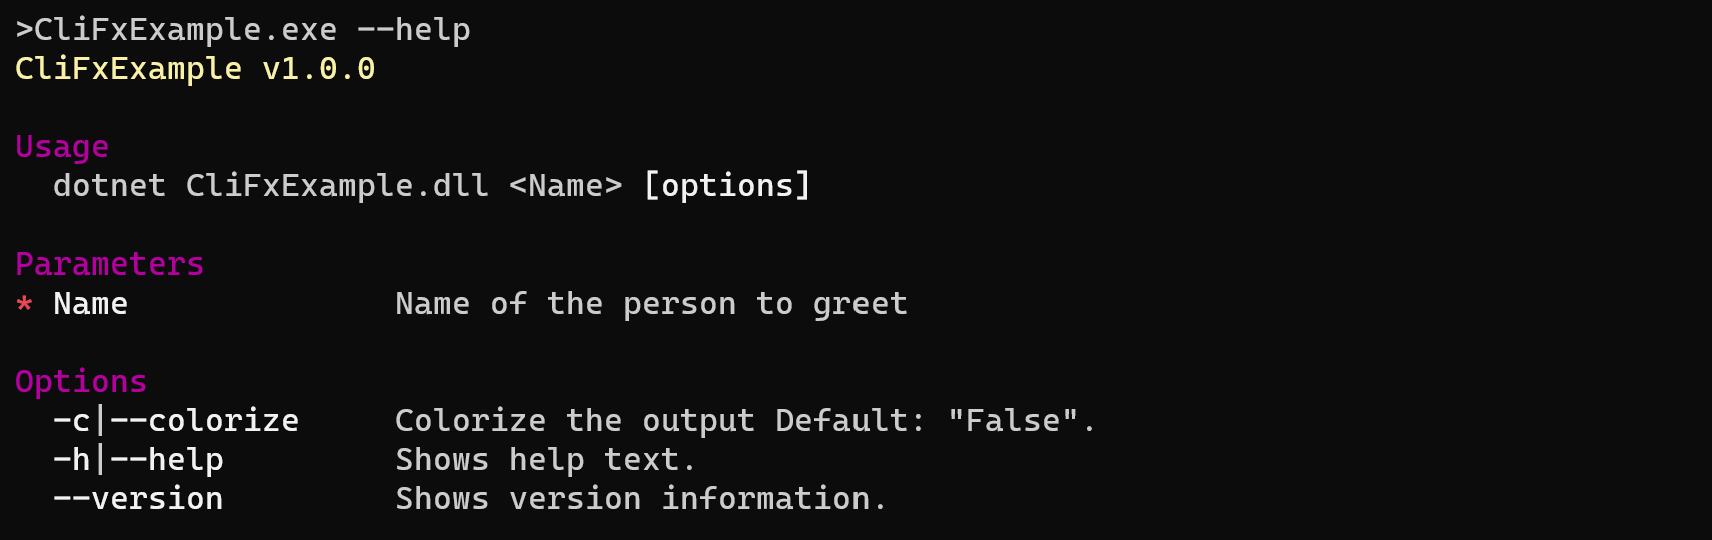
Running the command with the --help option will display the help text, and it shows the new colorize option is available.
Running without the colorize option specified shows the same output as before.

If the colorize option is specified, it now shows the name in green.

Defaulting with an Environment Variable
CliFx also allows you to source an option from an environment variable. This is useful if you want to be able to default behavior so you don’t have to specify the option every time they run. The example here isn’t very useful, but does demonstrate how it works.
To support this, you need to specify the name of the environment variable to use. Here, I am adding environment variable support to the Colorize option that we added earlier by making it look at the colorize variable.
[CommandOption("colorize", 'c',
    Description = "Colorize the output",
    EnvironmentVariableName = "colorize")]
public bool Colorize { get; set; }
If we set the environment variable, and then run the command, it will use the environment variable to configure the command.

If the option is specified via the command line, that will always be used in place of an environment variable. Here, you can see that the output is not colorized even though the environment variable is set.

Multiple Commands
Up to this point, the application has only had a single command, but CliFx also supports applications with multiple commands. To do that, you can give each command a name. First, I’ll change the existing command to have a name by specifying it in the [Command] attribute.
[Command("hello")]
public class HelloWorldCommand : ICommand
{
    ...
}
And then I will add a second command that can sum numbers.
[Command("add")]
public class AddCommand : ICommand
{
    [CommandParameter(0)]
    public int[] Numbers { get; set; }

    public async ValueTask ExecuteAsync(IConsole console)
    {
        await console.Output.WriteLineAsync($"{Numbers.Sum()}");
    }
}
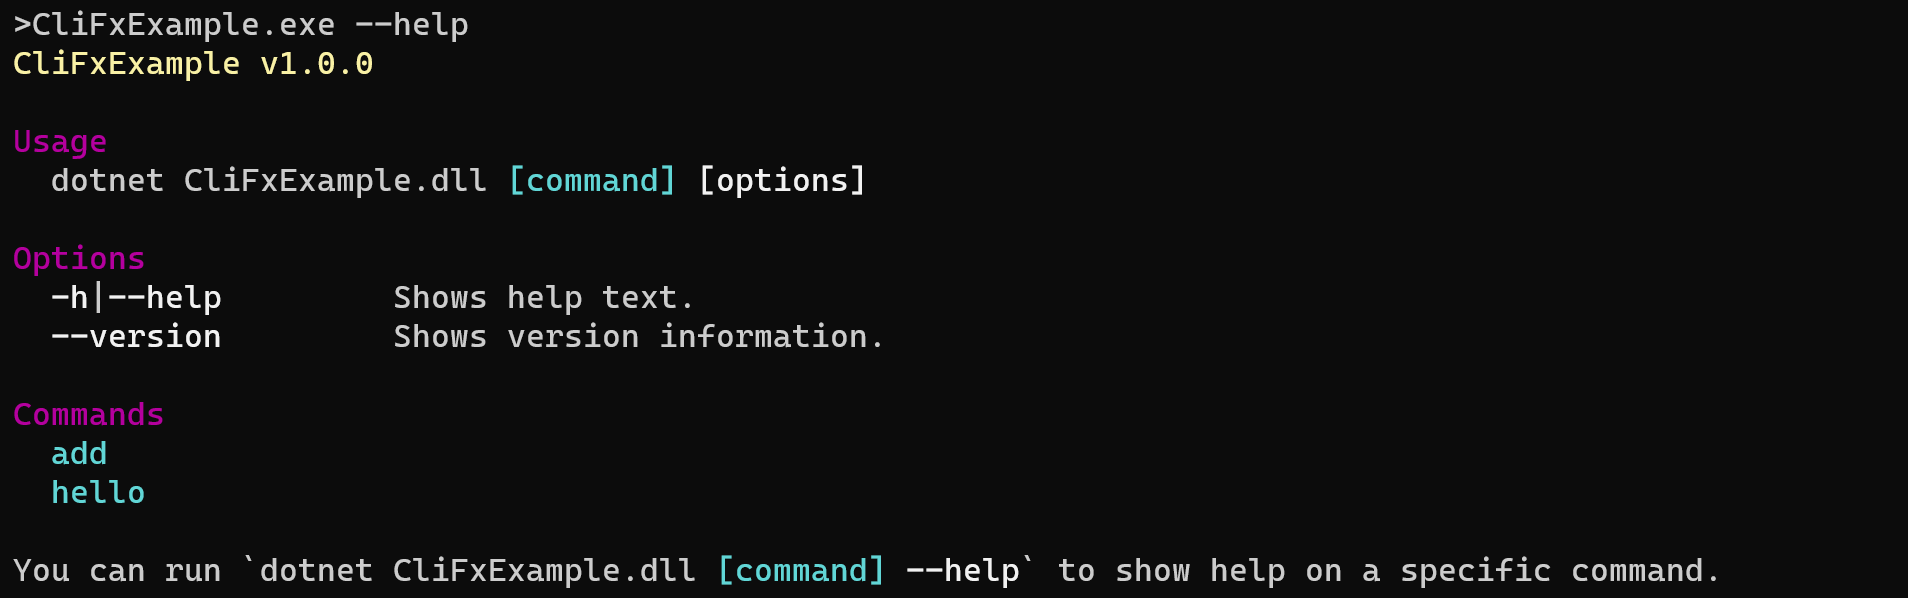
Running the command with the --help option will display the help text, and now it shows that there are multiple commands available.
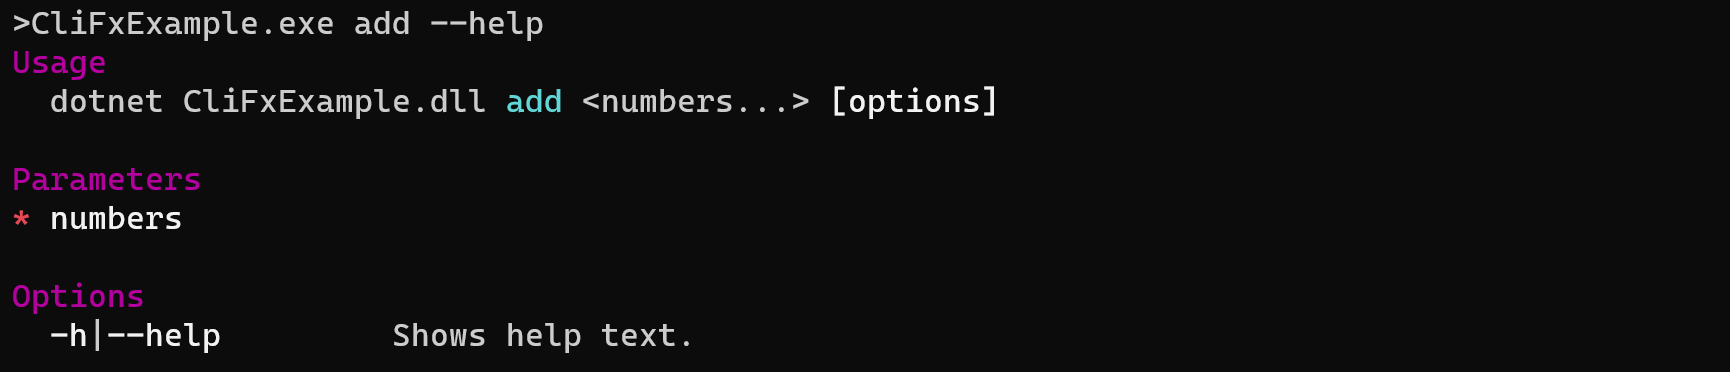
You can also specify a command along with the --help option, and it wil display the help text for that specific command.
To run a specific command you simply use the command name as the first parameter, followed by any parameters or options that the command supports.

Conclusion
The CliFx framework is very useful when writing command line applications. It takes care of all of the parsing of the command line, so that you can focus on the functionality that you are trying to provide.